Google Domain Ownership Vertification with Namecheap and Netlify
I will share with you how I was able to verify my domain on Google Search Console where I have my domain bought at Namecheap while my site is hosted at Netlify.
Just a quick overview of my setup, at first, I added my site on Netlify by importing it on GitHub. I just followed each step provided by Netlify because there is a literally progress bar at the top. While I am on adding a custom domain and I don't feel like changing my DNS provider so I just copied CNAME Records provided by Netlify and added it to my Namecheap DNS setup.
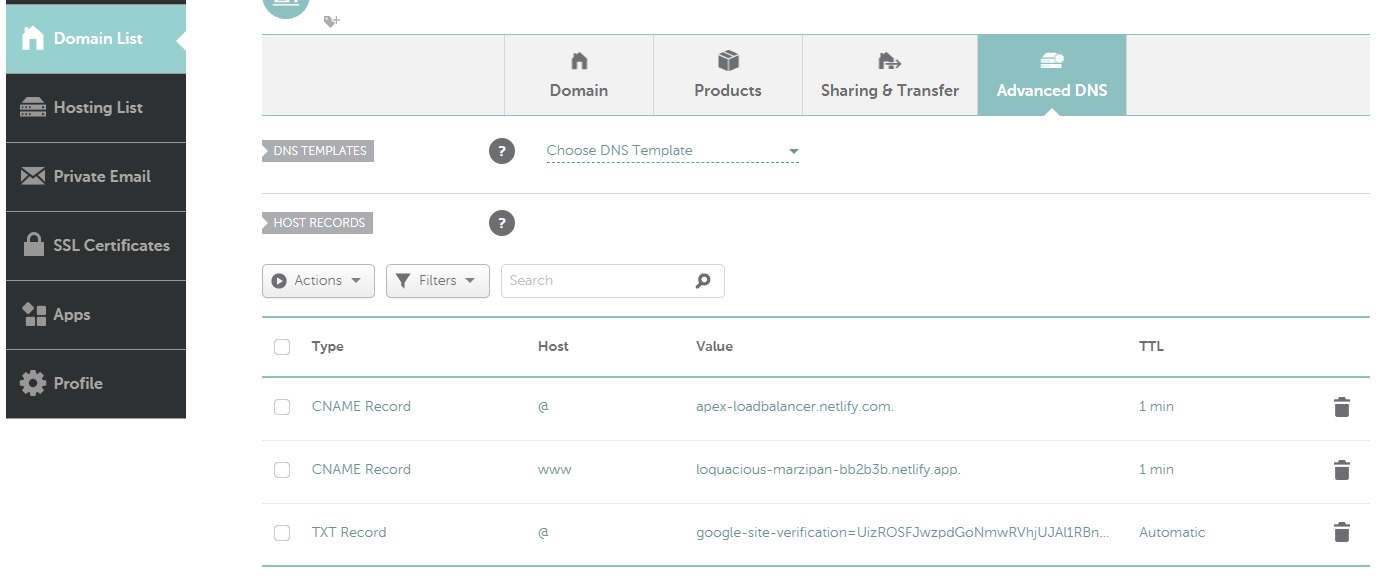
This is my Namecheap DNS records. If this is not available on your case, make sure that on the Domain tab, beside the NAMESERVERS row, select the Namecheap BasicDNS option.
The whole Netlify domain configuration works perfectly. However, I run into an "little" issue where this time around, I want my site to be indexed by Google and to do that, I have to add it to Google Search Console.
Let me bring you to my Google Console setup, I added a property which is a Domain Property and entered my domain.
Now, here's the "little" issue, in order to verify my domain ownership, I have to add a TXT Record to my Namecheap DNS Records. I proceeded with that. However, when I click verify on Google Console, I receive an error. So, I was thinking maybe there's some sort of propagation going on. I waited a day as I am not in a hurry but still it throws me an error.
I can't wait another day so this time around I'll point my Namecheap Nameservers to Netlify. In that way, I can add records now on Netlify because technically it will handle my DNS records now.
Here are the steps on completing the Google Domain Ownership Verification with Namecheap Domain and Netlify DNS.
Step 1:On Netlify, setup the DNS Zone for the domain.Step 2:On Google Search Console, copy the TXT Record for DNS verification.Step 3:On Netlify, add the TXT Record copied from Google Search Console.Step 4:On Namecheap, point the DNS to Netlify Nameservers.
Step 1: On Netlify, setup the DNS Zone for the domain.
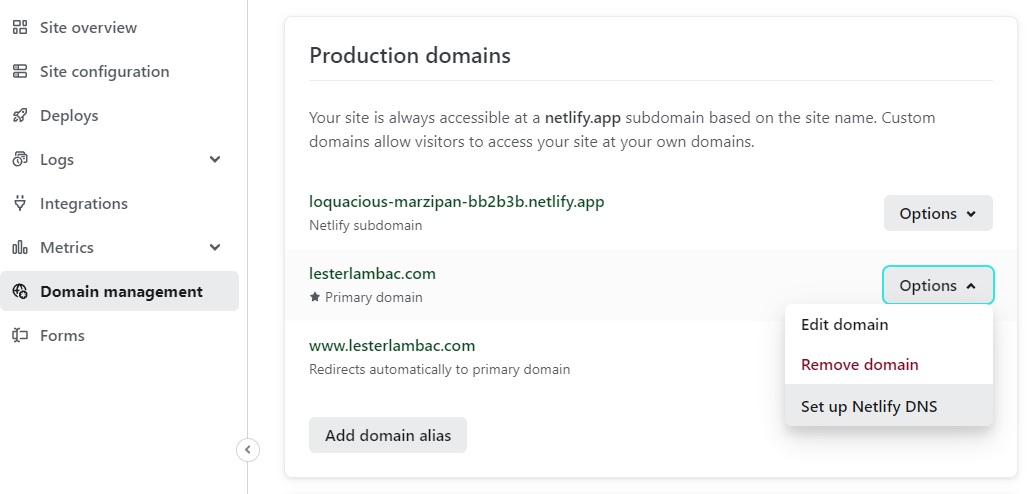
Start the Netlify Domain DNS Configuration by following their 3 steps - Add Domain, Add DNS records and Activate Netlify BasicDNS.
Click on the Verify button (you have probably verified your domain) and proceed to clicking the Add Domain.
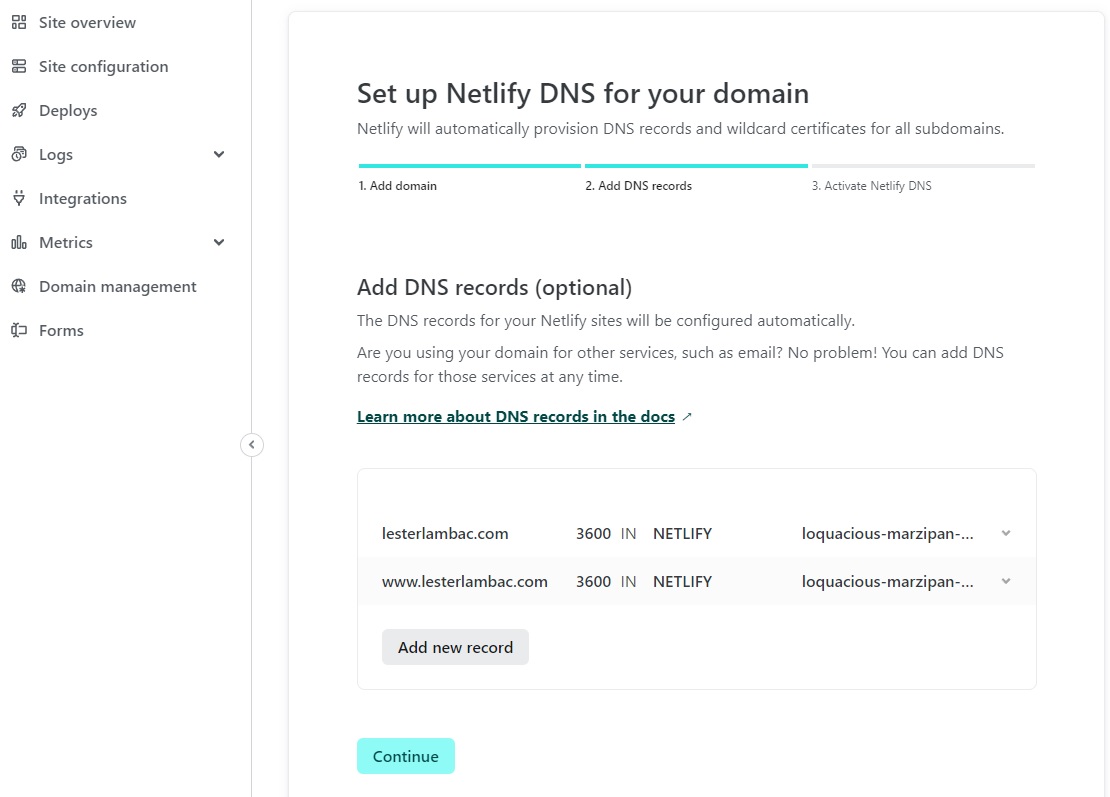
On this part of the Netlify DNS configuration we can now directly add TXT record given to us by Google Search Console. We can always add new record later but why wait when we can do it as we go along. Let's preserve this view and open Google Search Console.
Step 2: On Google Search Console, copy the TXT Record for DNS verification.
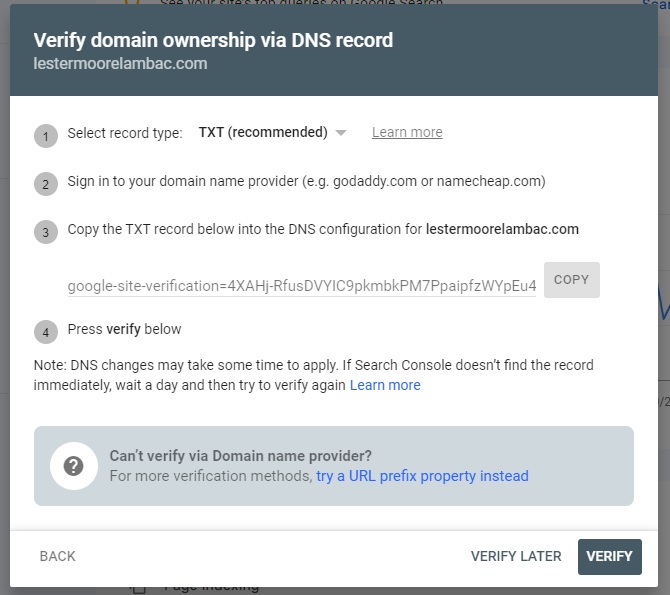
You can open a new tab and copy the TXT Record found on your Google Search Console Domain Verification.
On Netlify, add the TXT Record copied from Google Search Console
So, continuing with our progress on Adding DNS Records on Netlify, click on Add New Record, select TXT and paste the Value. After this, click on the Continue button and let's Activate Netlify DNS.
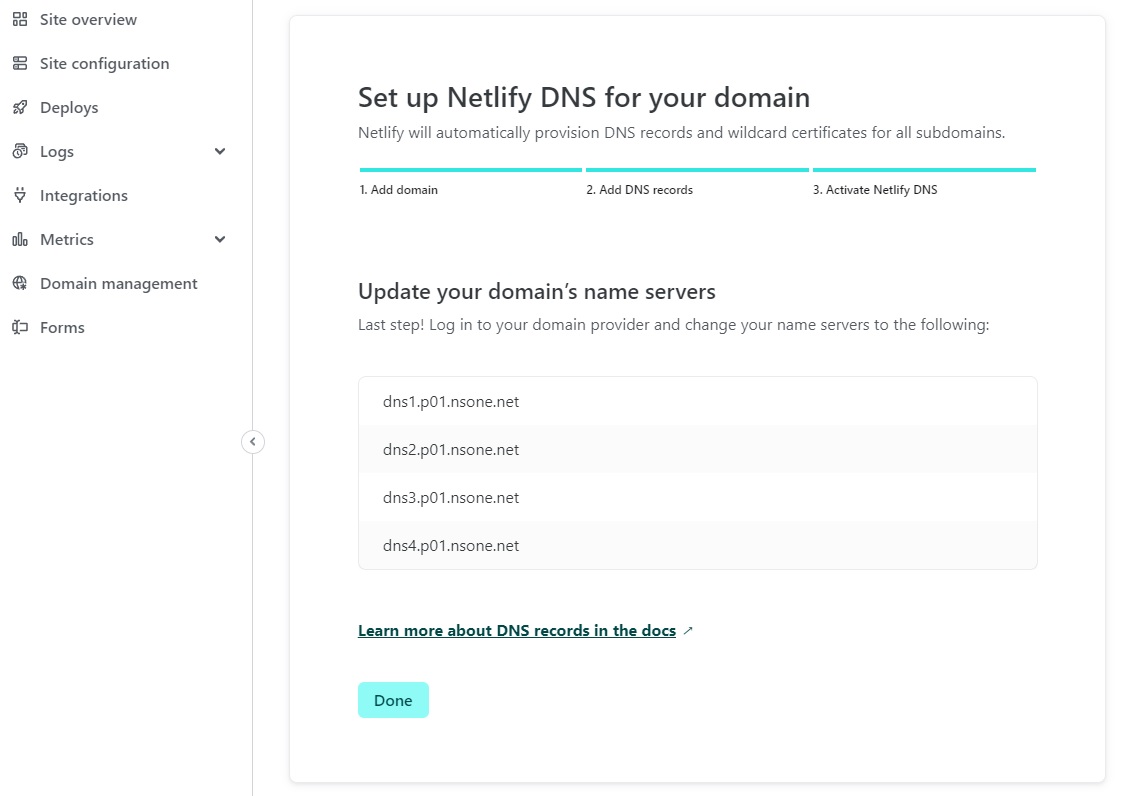
We can see this on our Netlify Setup. So these are the domain name servers we need to add on our Namecheap account.
Step 4: On Namecheap, point the DNS to Netlify Nameservers.
Login to your Namecheap account and under the domain, click on Manage.
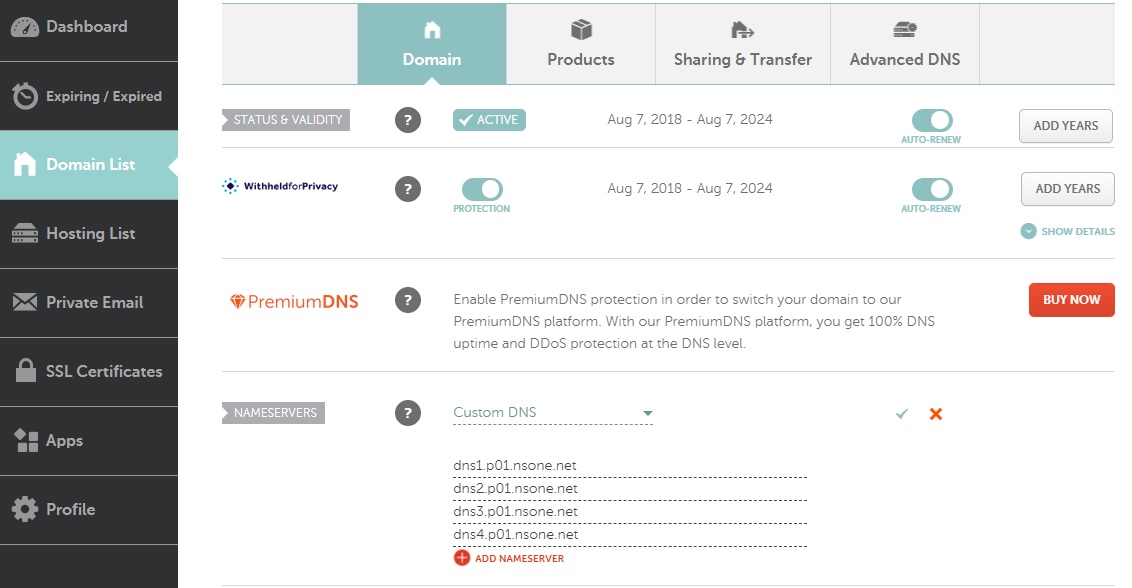
Beside the NAMESERVERS, select the Custom DNS and add the nameservers provided by Netlify. Then, click the check ✔️ icon to save it.
As final touches, on Netlify click the Done button. Then, on Google Search Console click on the Verify button. If all goes well, your domain should now be Google Verified Domain.